Introduction
The new SQL Server 2017 comes with new features in the installation. It now supports Machine Learning Services that support R and Python. It also includes SSIS Scale Out Master and Scale Out Worker. It also includes scale out options in PolyBase.
In this article, we will explain how to install SQL Server step by step.
Getting started
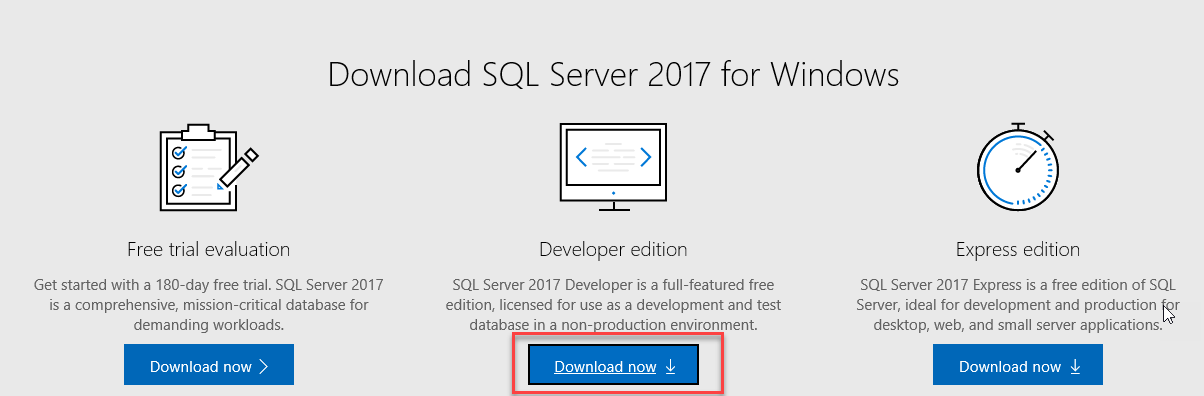
You can download the SQL Server 2017 installer
here.
You have 3 main options. The trial evaluation, Developer edition and Express edition.
The main question is which SQL Server edition should I use?
- The SQL Server trial evaluation is the free edition that includes all the features. If you want to check out any/all of the features, this is a complete version. It is a 180 days trial, but you can buy an Enterprise or Standard license later. Use this version if you plan to buy a license later.
- SQL Server Developer edition is free, but you cannot use it in production. For this tutorial, you can use any of them. I recommend this one if you use it for development purposes or for training purposes. It includes all the features also.
- The SQL Server Express edition is free and can be used in production, but it has a limitation in Storage (10 GB) and it does not include several features (SQL Server Agent, DTA, etc.). I recommend this edition if you do not have too much disk space or resources in your machine.
There are other editions like the SQL Server Standard and Web edition. They are cheaper versions than the enterprise. The Web edition contains the features necessary to work in a Web hosting environment. The Standard edition is like the Enterprise edition, but it has some limitations like the Transparent Data Encryption, Partition Table parallelism, mirrored backups, online indexing, etc. I recommend checking the features that are not included in this edition to check if it is a good idea to buy them to save money.
For a complete list of differences between SQL Server versions, refer to this
link.
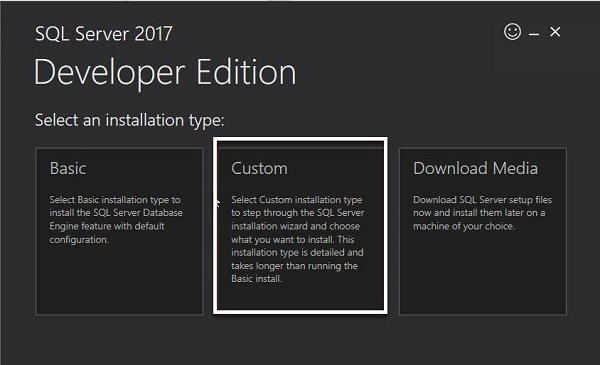
Once downloaded, run the setup file of the SQL Server installer. The Basic option will install mainly the Database Engine with basic components. We will use the Custom option to learn some other features included in SQL Server. Download Media is used to install later or to install in other machines:
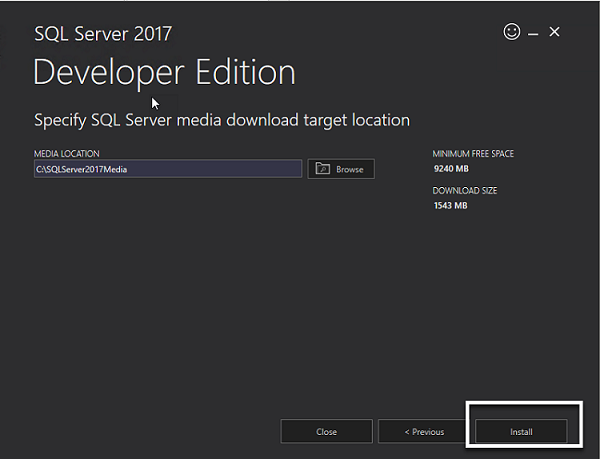
You can choose the installation location. It requires 9,000 MB of free space. Once selected, press Install:
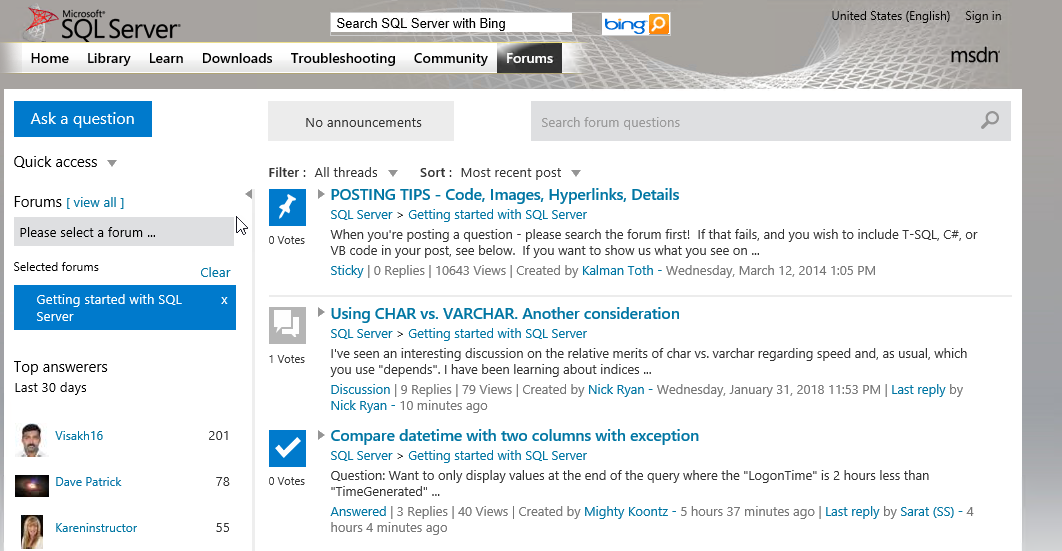
While installing, you will find useful URLs. For example, the following SQL Server forums. You will receive good advice
here:
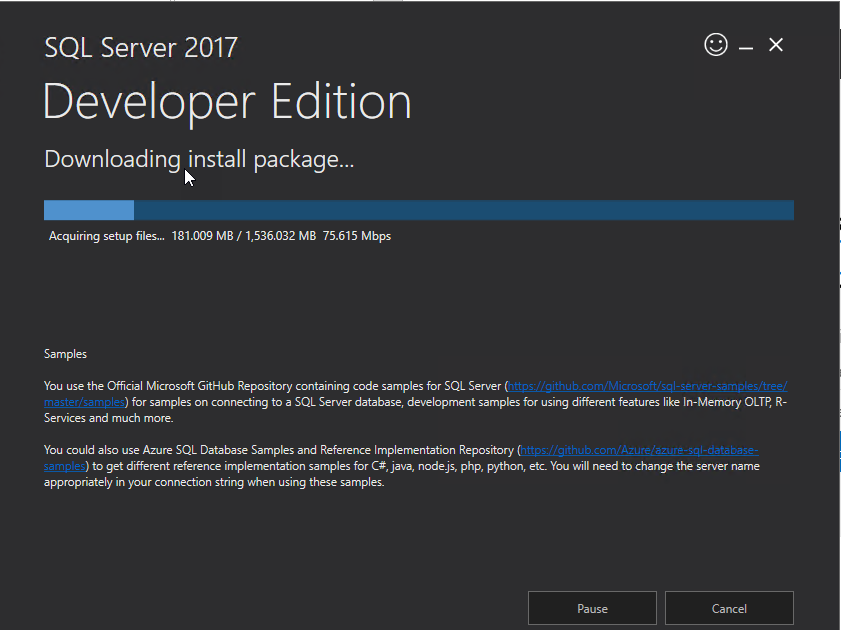
Also, it will show the
GitHub which contains sample databases, code samples and more.
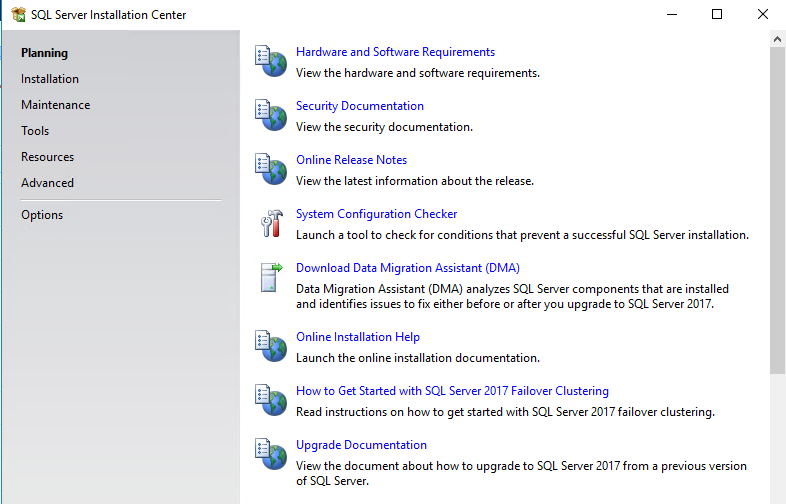
The installer will install in the Planning section. There are many nice resources here like the Hardware and Software requirements to verify if you have all the hardware and software requirements. You also have security documentation, System Configuration Checker, the Data Migration Assistant (DMA), Online installation documentation, Failover and Upgrading documentation:
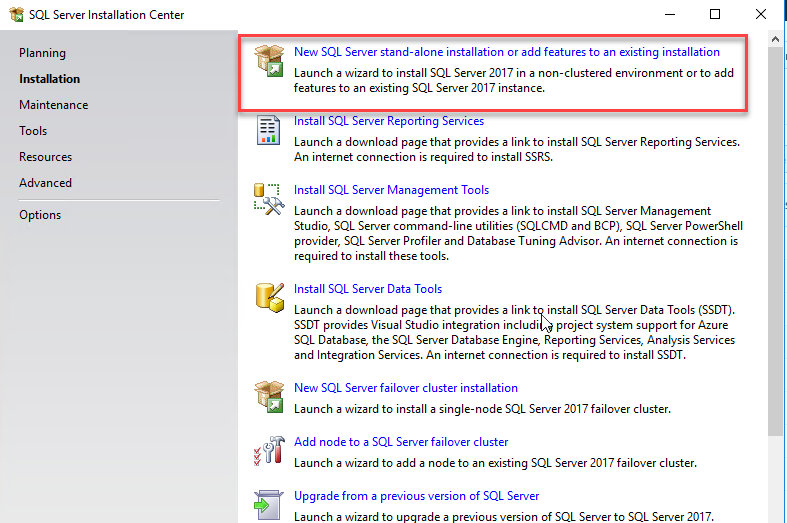
We will go to the Installation section and select the option New SQL Server stand-alone installation. Note that SQL Server Reporting Services is installed separately:
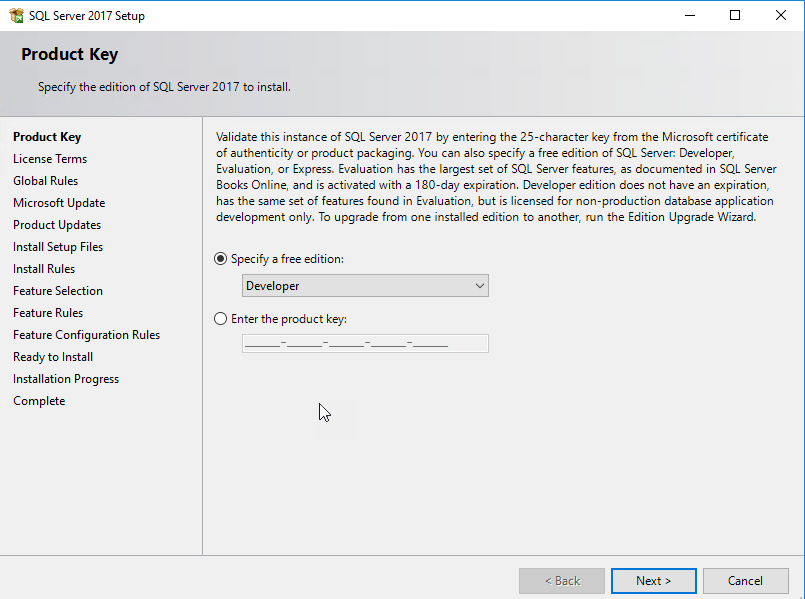
In product key, you can specify a license or select a free edition. In this example, we will install the developer edition:
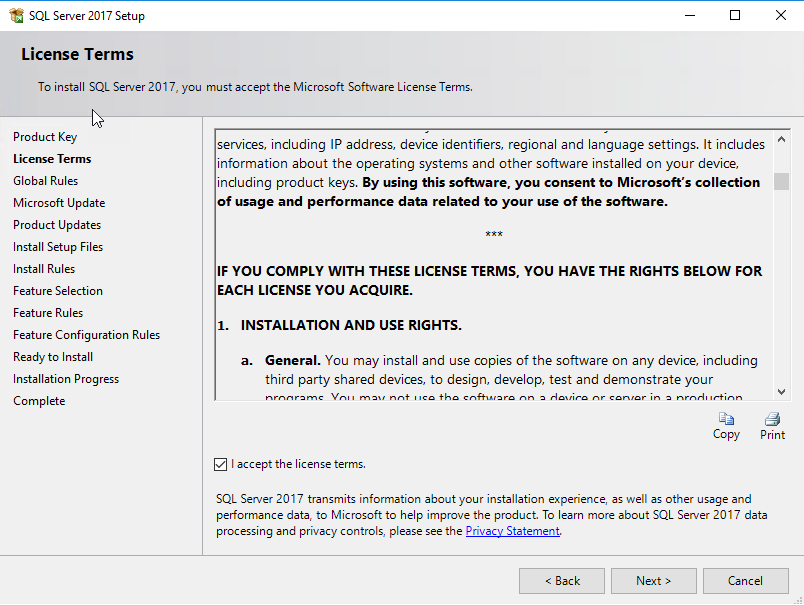
License Terms will show the terms to install it. Accept the license terms:
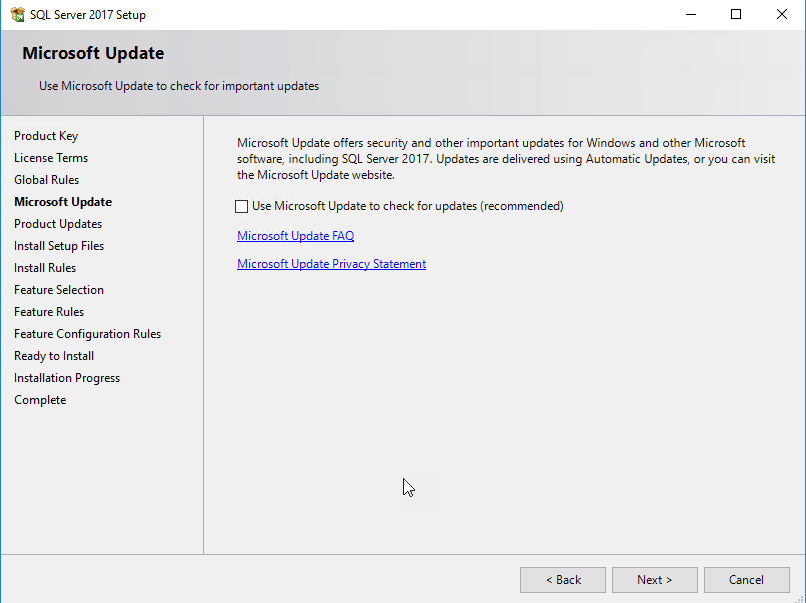
In Microsoft updates, you can verify if there are updates in the installer:
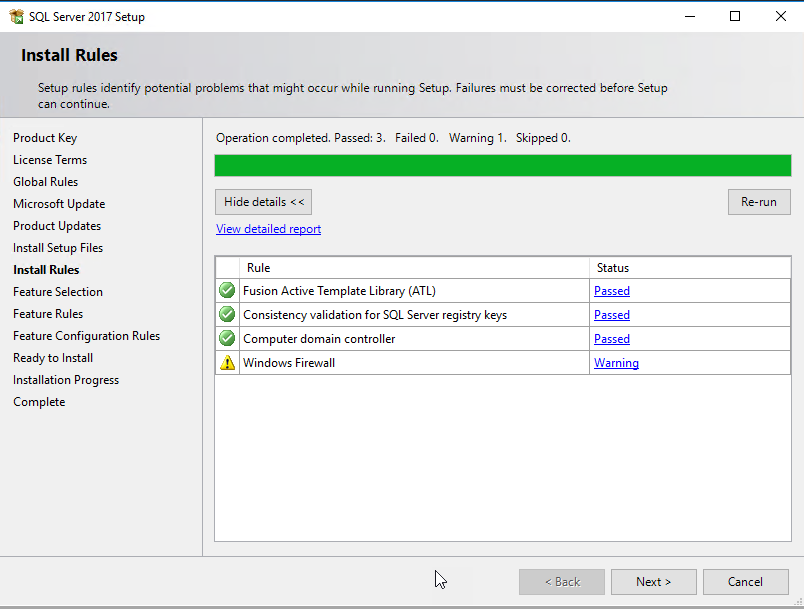
The Install Rules will verify the Active Template Library, the registry keys and if the computer is not a domain controller:
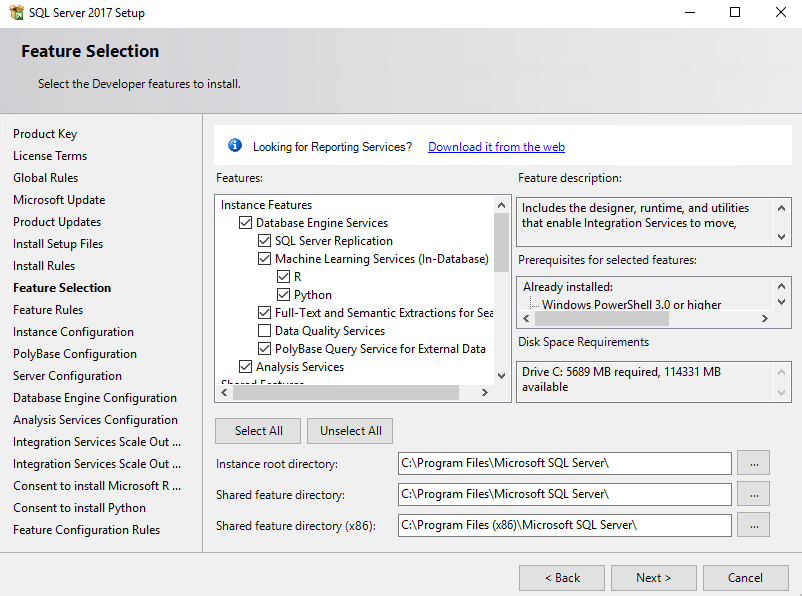
In the context of the Feature Selection, Data Engine Services is the database itself.
- Replication is useful if you want to replicate your data in another server or another SQL Server instance.
- Machine Learning Services (In-Database). You can install R or Python. SQL Server 2016 included the R Services. Now, you can have R and/or Python.
- Full-Text and Semantic Extractions for Search used for full-text queries.
- Data Quality Services is used to enrich, standardize and avoid duplicate data.
- Another nice feature is PolyBase used to query NoSQL Data.
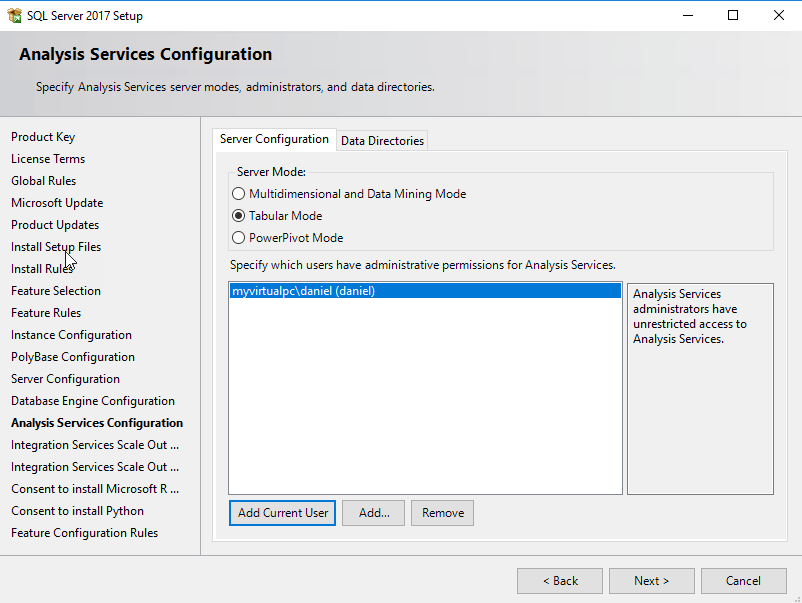
- Analysis Services is used in Business Intelligence (BI) to generate cubes to create Enterprise Reports with a multi-dimensional technology:
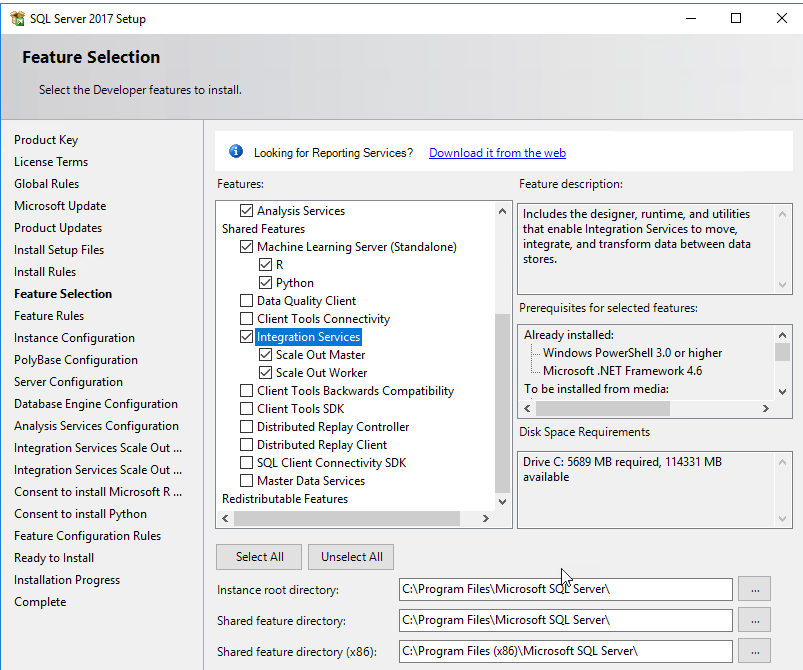
You have Machine Learning Services (In-Database) and Standalone. The first option is to install the SQL Server Database Engine. The Standalone does not require a database engine.
Data Quality Client is to perform quality operations using standalone tools. In Integration Services we have the option to install
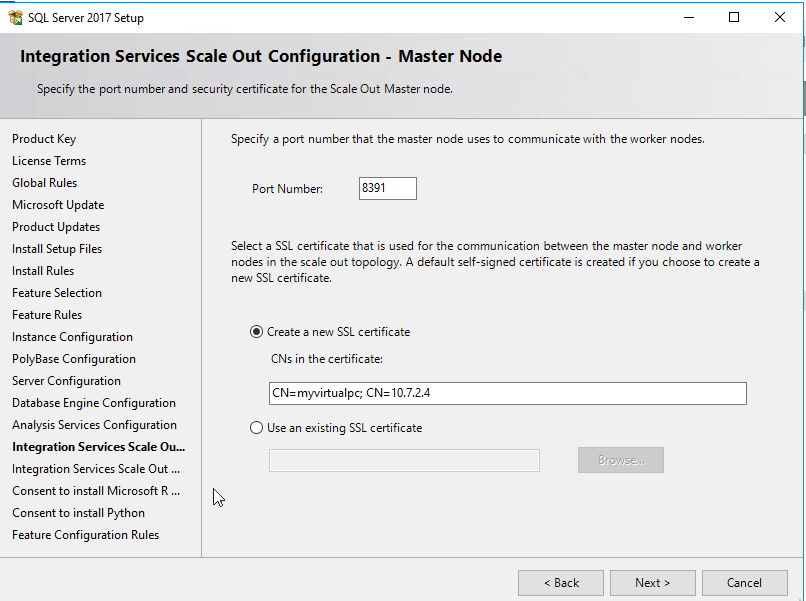
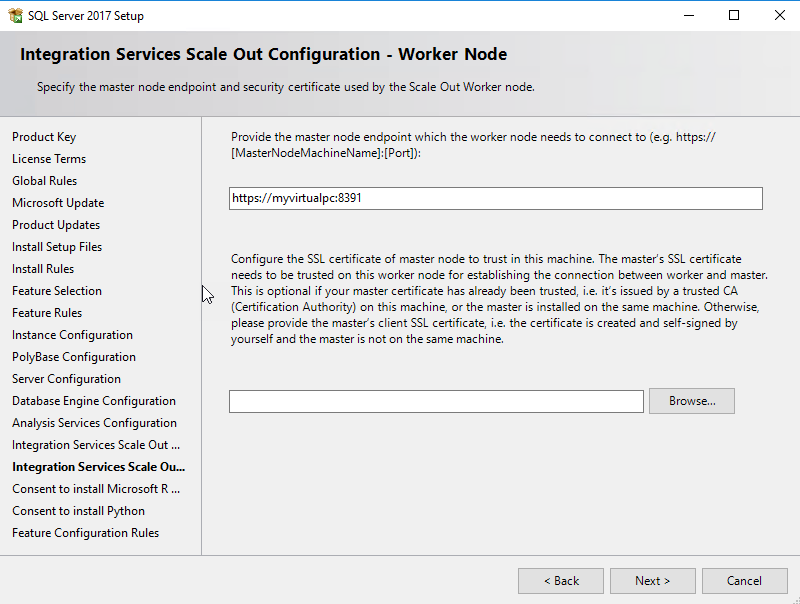
Scale Out Master and Scale Out Worker. With this feature you can distribute the packages in different Servers to provide better performance. The master is the responsible for the operations and the Workers receive the tasks. Client tools backward compatibility includes tools to work with earlier SQL Server versions like
deprecated tools,
discontinued tools and
breaking changes in SQL tools.
Client tools SDK contain resources for programmers.
Distributed Replay Controller is the feature in charge to administer the distributed Replay clients. The Distribution Replay is used to capture a trace, verify performance, security, for upgrades or test environments it is like the SQL Profiler, but distributed Replay can trace multiple servers.
You can install the Distributed Replay client to simulate workloads.
SQL Client Connectivity SDK will install SQL Server OLEBD and ODBC connectors that can be used to connect to SQL Server using.NET, Java, PHP or other programming languages.
Finally, the Master Data Services are used to organize your data into models, creates rules for the access to the data and control who is using it:
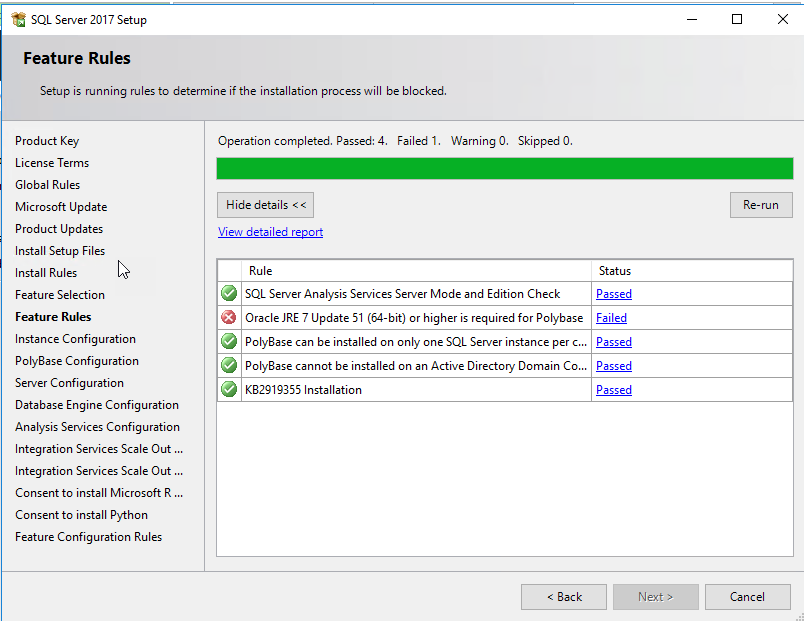
If you select to install PolyBase, the setup will ask for the Oracle JRE. You can obtain the JRE installer in
the following link.
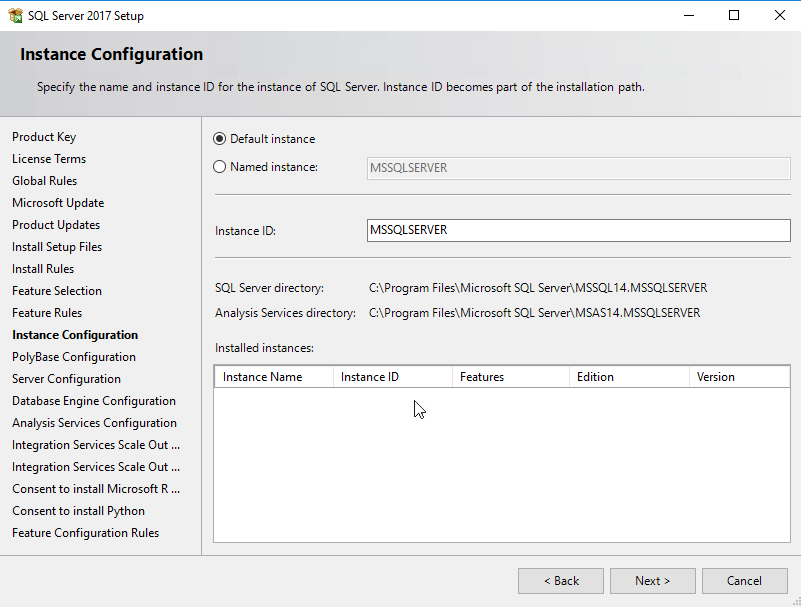
You can have multiple SQL Server instances in SQL Server in the same server. This can be useful to simulate and practice replications, mirroring or to have separate instances for different purposes. By default, you can install the default instance that is usually the Server computer name:
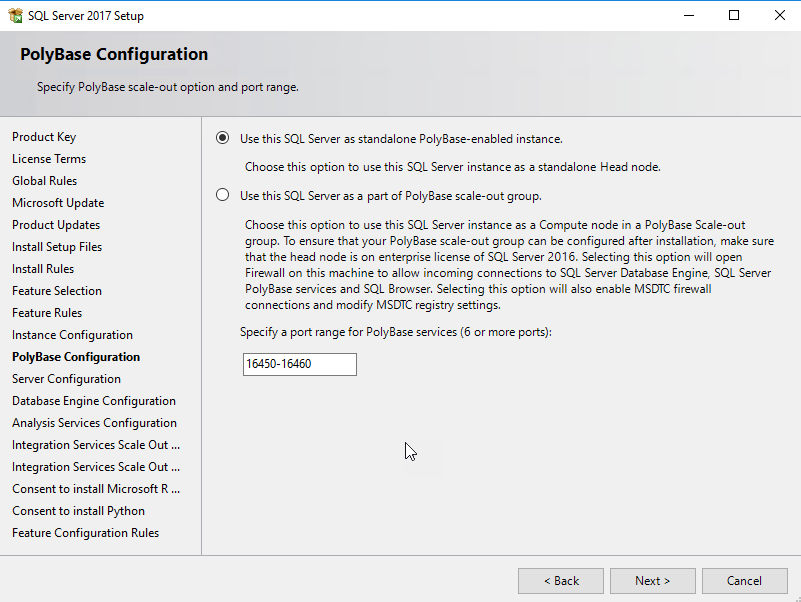
In PolyBase you can now install as a standalone instance or using a
PolyBase scale-out group. The Scale-out group is used when you need to query massive data and you need to distribute the job across multiple SQL Server instances. This option requires to enable ports and enable the MSDTC:
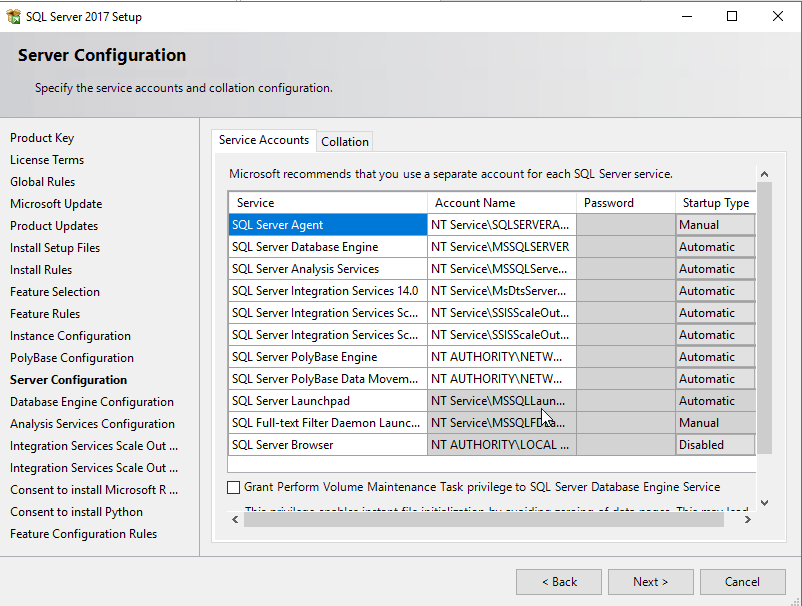
There are account names created automatically for each service. It is a good practice to keep them. Do not grant administrative privileges to these accounts unless there is no other choice:
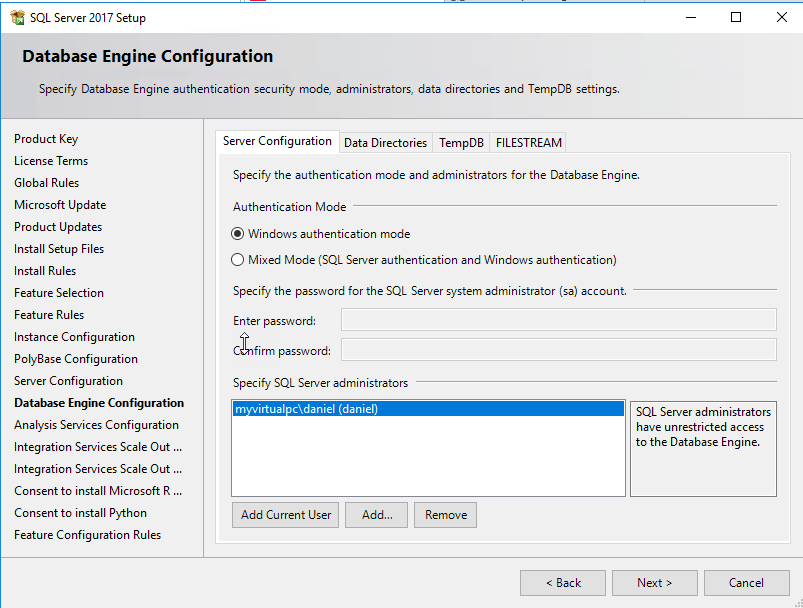
There are two options in SQL Server to authenticate. Windows authentication will use the Windows Account to authenticate in SQL. Mixed Mode allows creating internal logins and passwords inside SQL Server. You can Add accounts here using the Add Current User or by pressing the Add button:
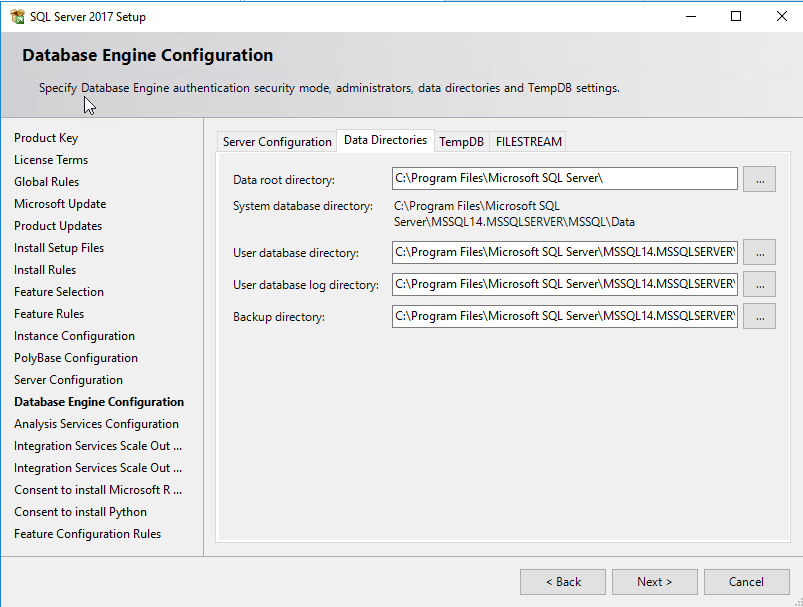
In the Data Directories tab, you can choose the location of your data file and log file. It is a good practice to have them in separated drives to improve performance and increase security for disaster recovery.
For more information. Refer to this
link.
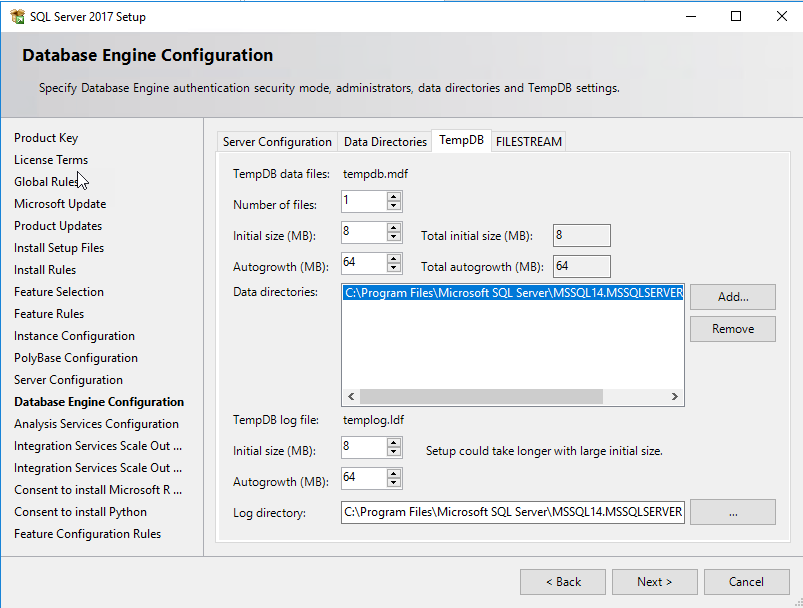
The
TempDB tab is used to configure the TempDB database. This is a system table used to store temporary data. Check our article to improve your database performance by configuring this database correctly:
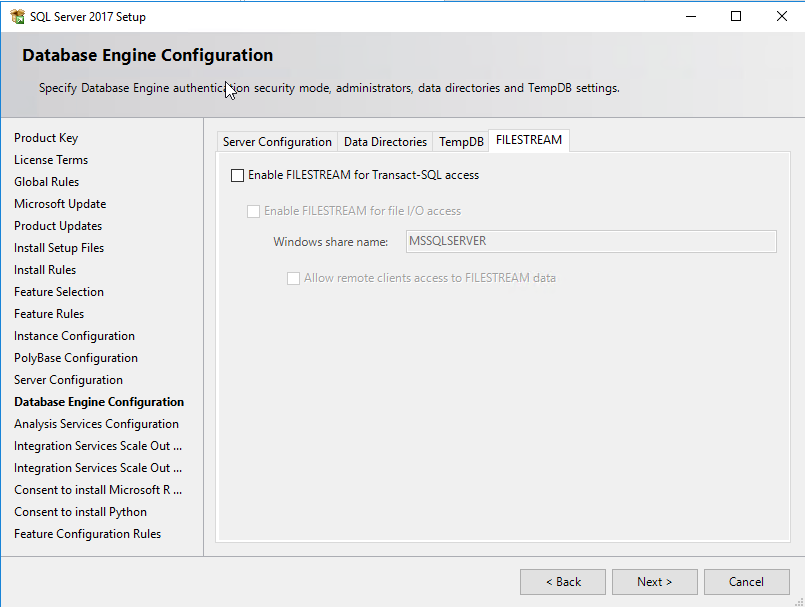
FILESTREAM allows to store non-structured data like documents, images in the database:
The Analysis Services Configuration allows installing a Multidimensional and Data Mining Mode. This is a multidimensional cube that allows creating fast queries for enterprise reports. Another option is to Install Tabular Mode. The Tabular databases are dependent on the RAM. If your database will have several TB of information, the Multidimensional option is better. If you require Data Mining services, the Multidimensional option is better. For more information about Multidimensional vs Tabular Models, refer to this
link.
PowerPivot can be used in Excel or if you can use it in SharePoint. PowerPivot for Excel can be used to create your reports. If you need to share with multiple people you can use SharePoint. You can add users with administrative permissions:
Integration Scale-Out Configuration – Master Mode will be used to define the port to communicate between the master and worker nodes. You will also be able to create the certificate here or use an existing one:
In the Integration Services Scale Out Configuration – Worker Node, you need to specify the endpoint of the Master Node, which is the master node name and the port. You can also specify the SSL certificate here:
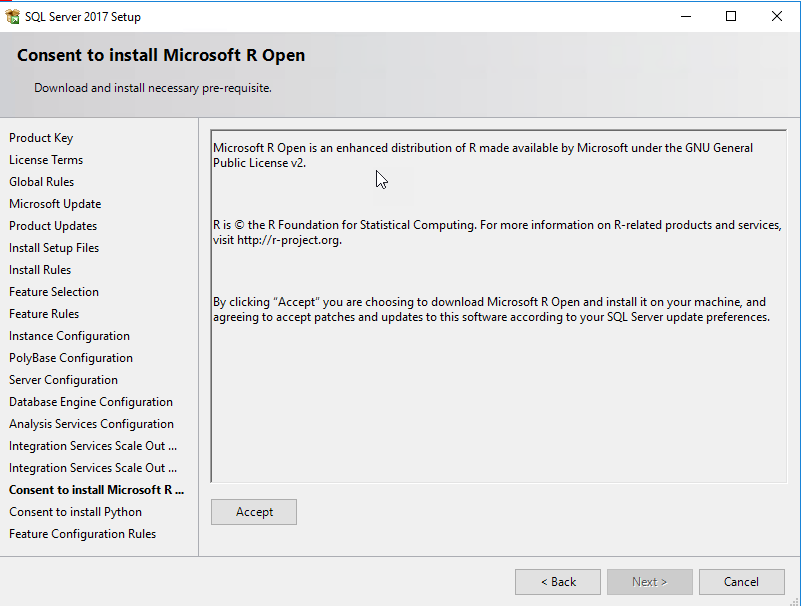
You will receive a question if you want to install R. Press Accept and then next. R is a very popular language used for machine learning and other uses:
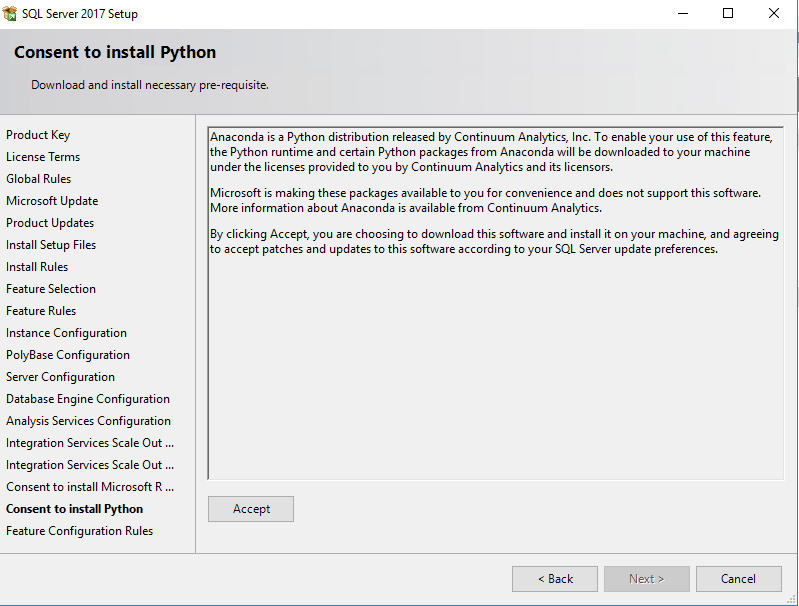
You can also accept to install Python which is a competes with R and offers many useful capabilities
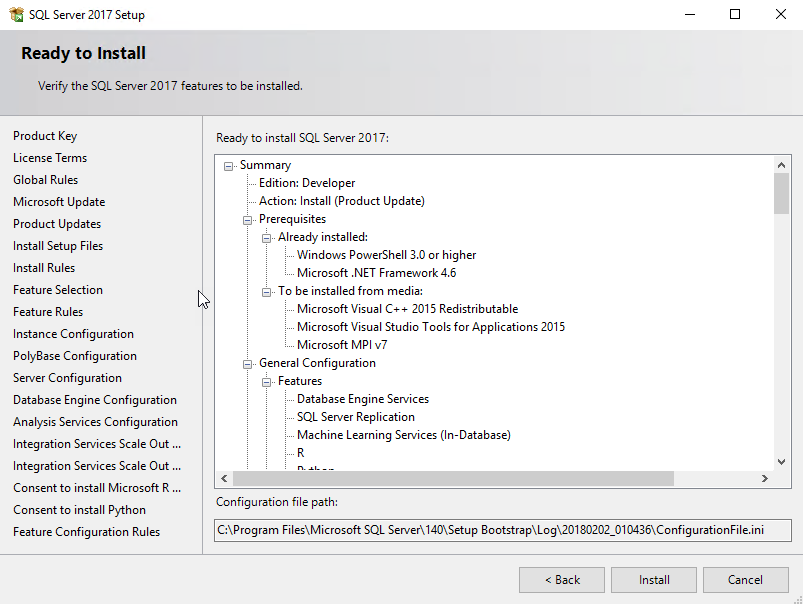
Once that you have everything installed, you can verify the configurations. If everything is OK, press Install:
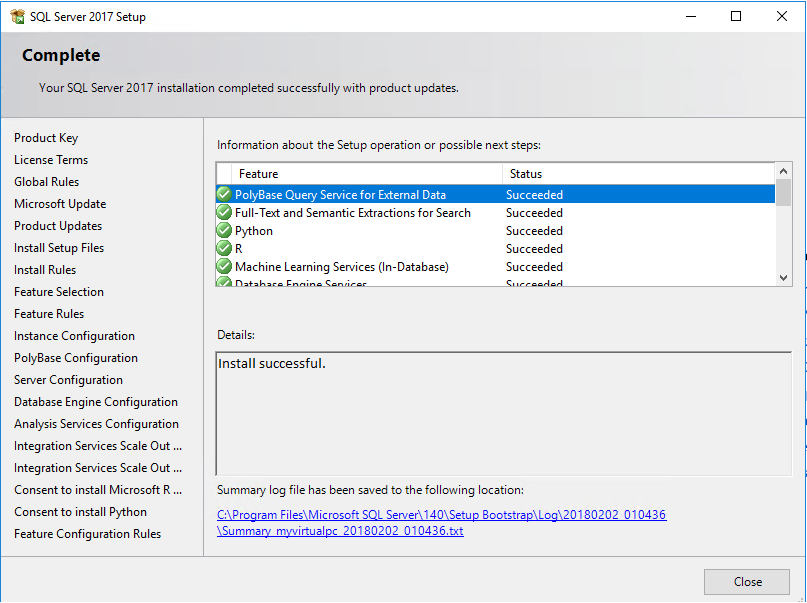
After 15-45 min, you will have your database installed:
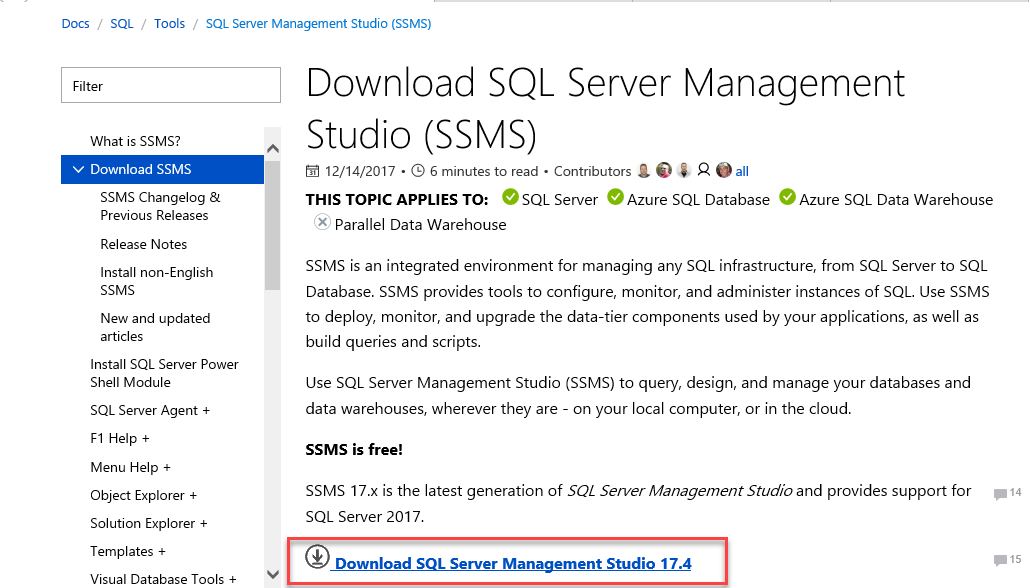
Once installed the database and other components, open the installer. In the Installation section select the option to Install the SQL Server Management Tools:
It will go to the SSMS web page, download the product:
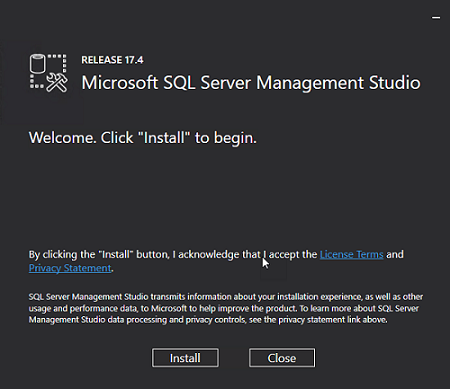
Once downloaded, install the product:
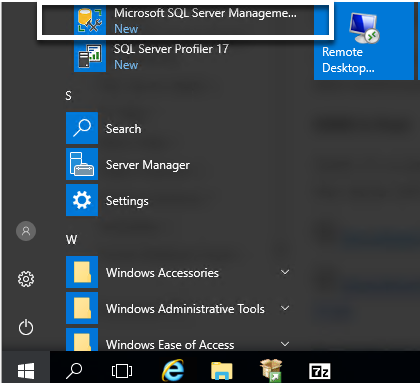
In the Windows menu, open the Microsoft SQL Server Management Studio:
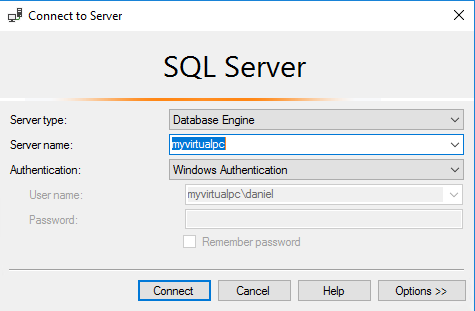
Select the SQL Server name and press Connect:
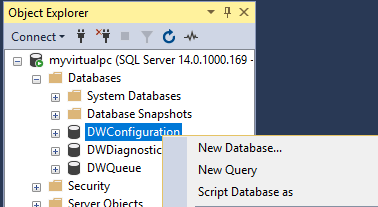
Select a database. Right click and select New Query:
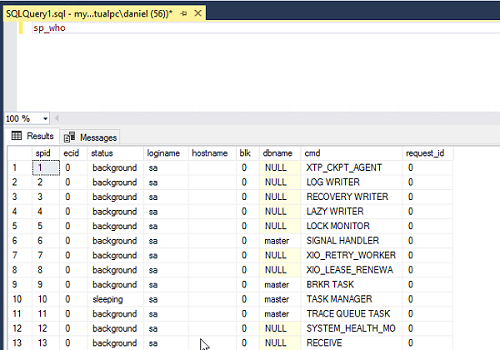
We will run a system stored procedure. The sp_who that will show the sessions, users connected and processes:
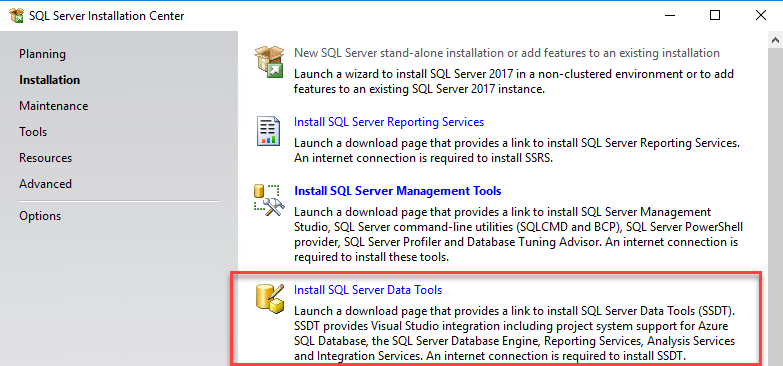
Another tool that is installed separately is the SQL Server Data Tools. This tool will help you if you want to work with BI tools like SSAS, SSIS or SSRS:
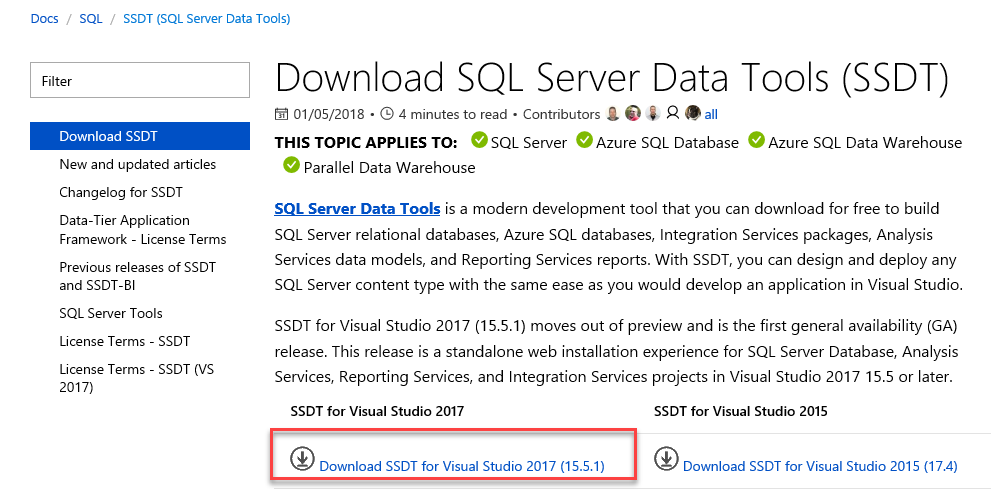
The link will go to the SSDT web page you can download the last version here:
Conclusion
SQL Server 2017 comes with many new features like the Python support, SSIS Master Scale Out, worker nodes. In this article, we learned how to install SQL Server 2017 and learned about some of these new options and features. I hope you enjoy working with SQL Server 2017